Waiting lists are there to let you choose which contact you want to handle. You can place a contact in a waiting list, if you have the access rights to do so.
In the queue status window you see that is a waiting list by the media icon having a yellow list behind it. The names of the waiting lists are seen underlined to show that you can click on them. If the text is grey, this waiting list belongs to a service you are not logged in to.
When you have clicked on the name of a waiting list in the queue status window, this list – with the contacts in the list – appears in the so-called support functions area in CallGuide Agent’s main window.

The waiting list occupies the entire support functions area if there are no more support functions. If you want the waiting list to open as large as possible, i.e. cover the entire support functions area, you can, in Client setting, specify that support functions are to be maximized automatically.
Using the minimize button at the right corner of the support function you make the waiting list cover just one of the support function’s so-called positions. The support function is also minimized when another support function is opened.
Click on a waiting list to open it. The waiting list is closed when you click on the cross beside the minimize/maximize button.
You who handle incoming calls and/or callback calls from more than one waiting list can use support function Merged waiting list., showing all contacts in one single list.
New contacts arriving to a waiting list are seen in bold for a while. Beside the name of the waiting list you see the number of new contacts in the list.
You select a contact to process by double-clicking on it with your mouse or by using the arrow buttons and pressing Enter. Your chosen contact is routed to you. If for some reason the contact could not be routed to you, e.g. because another agent beat you to it, you will receive a message and the contact will be greyed in the list for a while to prevent you from choosing it again by mistake.
Contacts routed to other agents are automatically removed from the list of contacts.
If you already have a contact in progress and pick a new contact from your waiting list, the first contact is automatically parked, provided you have the access rights to park contacts, and that your CallGuide solution is configured for parking. CallGuide informs you that his is not possible.
In some cases you cannot pick a contact from a waiting list. Like when you, for example, have another contact in progress that cannot be parked. CallGuide informs you in an information pane.
In email waiting lists there are icons  to the left of each email contact. If you hold your mouse pointer over the icon
  you get at content preview for that specific email.
If you have the required access function in your access role you can delete an email already in the waiting list, if you e.g. know that it is a duplicate mail or an unwanted spam. Just open the right click menu and select the Close email choice.

When you open a waiting list the contents are sorted according to what is configured in CallGuide Admin. You select another sorting order by clicking on the heading for the column you want to sort by. A barely visible triangle after the heading name shows which column you have sorted by.
The contents of the list are first sorted numerically or alphabetically in an ascending order. If you want to sort the list in a descending order you click once more on the same column heading. The grey triangle is now seen upside-down to show that you have changed the sorting direction.
New incoming contacts end up at the bottom of the list. If you want the new incoming contacts to be sorted by your chosen sorting order, you have the option of locking the sorting order, i.e. set that CallGuide automatically sorts by the column you have selected. Specifically for Waiting lists for callback appointments and Merged waiting list you may want to see the due callback contacts on top.

 Ctrl
Ctrl
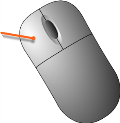
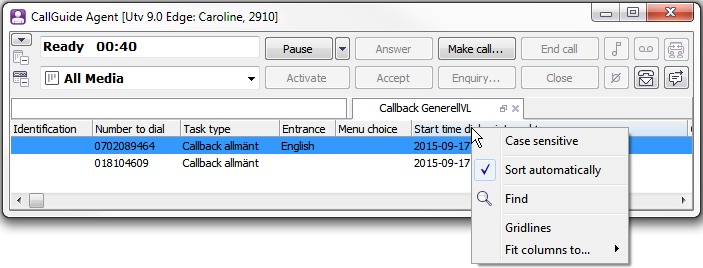
You do this by holding down the Ctrl key as you click on a column heading, or right-click on the column title in question, selecting Sort automatically. You can do this in both sorted and unsorted aspect.
A black triangle after the heading shows which column you sorted by and that the sorting order is locked.
The locked list is first seen sorted numerically or alphabetically in an ascending order. To sort the list in a descending order you do as for an unlocked list - just click once more on the same column heading. The black triangle is now seen upside-down to indicate that the sorting order has been changed but also that the sorting order is locked.
To return to unlocked sorting order you press the Ctrl key as you click on the column with the locked sorting order or deselect the Sort automatically menu choice in the context menu. You thereby unlock the sorting order meaning that new incoming contacts end up at the bottom of the list again.
